The snow we shovelled was up to my knees. Tired!! I don't know if you can see those poor trees in the background weighted by the snow!! The oaks still had their leaves and the older ones simply didn't hold up to the weight of the snow. Needless to say, I am keeping things simple this holiday.
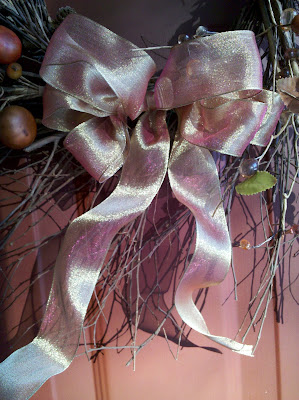
I completed my Fall wreath for the front door prior to the storm, thank goodness.
I started with a purchased twig wreath and some Fall foliage floral picks. I placed the picks around the wreath in a way that pleased me and added a few dried weeds from my yard for texture. I made my own bow using wire-edged ribbon that had a nice Fall ombre' to it. I am particularly pleased about the bow because I am a Bow-Challenged Crafter (as much as I hate to admit it).
For a decorative touch in my powder room I placed some tiny pumpkins and a few berry sprigs in a tall vase and set it on the shelf.
Here again I was lucky in that I set up the display initially for Halloween and when Halloween passed I simply removed the elements that were specific to that holiday (the spiders and skull...)
These tiny pumpkins are fun to use in your decor...you can find some additional uses in my post last year titled: Quick Fall Table Decor Using Tiny Pumpkins.
I wanted something natural and homey for my Thanksgiving table. I turned to Martha Stewart's Encyclopedia of Crafts book because I recalled seeing decor using acorns and leaves (and I have plenty of those!)
Sure enough, the book has a section about "Acorn Crafts" that includes 4 projects: a pincushion; an acorn-topped box; a garland; and, a napkin ring. I really would like to make the garland but, for the sake of time I settled on the simplicity of the napkin rings. Each ring uses two acorns and one oak leaf.
Martha Stewart used real oak leaves and preserved them with a glycerin solution. I did not have the time, nor the desire, to preserve my oak leaves so I stole some silk ones off of the fall garland I had on my mantel.
I collected some acorns with caps that fit (plenty of those lying around the yard now!)and used my Dremel tool fitted with my 1/16th" bit to drill two side-by-side holes through the top end of each cap. I inserted 16" lengths of 22-gauge wire from the inside of the cap so the ends stuck towards the outside.
I twisted the wire ends and attached the acorn bodies to their wired caps with wood glue.
I wrapped the acorn stems with floral tape (... which is stiiiiicky!!!) . I also used floral tape to attach one oak leaf per napkin ring to a piece of 22-gauge wire (covering the wire as well.) To use floral tape you need to stretch it as you tightly wrap the element.
Note: I wondered why Martha used plain wire and then covered it, rather than pre-covered floral wire so I bought both types. I found out that when the cloth-wrapped wire is pushed through the hole, the cloth part gets jammed up behind the hole which allowed only the wire to poke through. You can see that in the photo below.
I do wish Martha would explain stuff like that.
The photo below, from left to right, shows the elements (and steps) that comprise one napkin ring: a wrapped leaf stem; two wrapped acorn stems in opposing directions; the leaf stem attached to an acorn stem, then all wrapped together and covered with brown hem tape.
Martha's instructions guided me to wrap the wired elements with floral tape, and attach one leaf wire and one acorn wire together with brown floral tape, then wrap the units together with brown seam binding...gluing at the ends. I did my first one that way but found an order of steps that worked better for me on all the others when I was ready to apply the seam binding (which I could not find...so I used "Soft and Easy Hem Tape" and found that one package was good for two napkin rings.)
After wrapping each wired stem with floral tape this is the process I found to be most efficient:
First: Wrap a leaf stem with the hem tape...securing the end with a small wrap of floral tape.
Second: Wrap an acorn stem with the hem tape...adding the leaf stem to the wrap when you get down an inch or so (which hides the ends of the leaf stem). See photo below:
Third: When you are a couple of inches from the bottom, add another acorn stem, positioning it so the acorn is heading in the opposite direction, and continue wrapping with the hem tape until you reach the acorn.
These would also be pretty snaking up a candle stick, wrapped into a wreath, a vase, a chandelier -- the possibilities are something to think about. But not right now! Now I have to get everything else ready for my table...tomorrow!!!
HAPPY THANKSGIVING EVERYONE!!!


Really neat tutorial!
ReplyDelete